As designers and typographers, it’s always heart-warming to see our work in use. Spotting my font family, Citarella Gothic, always makes me happy. This Sunday, I had the added enjoyment of seeing two weights of the typeface created in metal for the Park Francis in Hamilton Park, Jersey City. As far as I can tell, the logo and signage was created by Chris Rudloff of New World Group in Secaucus, New Jersey.
building
Making a Server
In the past, I’d had a few more DIY photologs (Making a Closet, Making a Patio, Making a Genovese) and thought it was about time that I put a new one online.
Last month, our Linux sandbox server died—presumably from heat prostration. So while we were shopping around for a new one, we thought: “wouldn’t it be better if we just built the server ourselves rather than ordering some pre-fab system that doesn’t really suit our needs?” (tons of fans, Debian Lenny/Linux, small, etc.). The parts arrived a few days later. Above is a gallery of the server construction. I’m happy to report that for the last few weeks, the server has been quietly humming without any problems.
Here’s a the step-by-step process of the server’s installation. Below the gallery, you can see a list of the parts we ordered.
| Part | Price |
| Rosewill R101-P-BK 120mm Fan MicroATX Mid Tower Computer Case Item #: N82E16811147112 |
$29.99 |
| Foxconn A76ML-K 3.0 AM3 AMD 760G Micro ATX AMD Motherboard Item #: N82E16813186215 |
$44.99 |
| Hitachi HDS721616PLA3 80 160GB 3.5″ SATA 7200RPM 8MB Pull Drive Item #: EBTECH-719855 |
$33.99 |
| LOGISYS Computer AC610 92mm Hydro Beta 10 AMD CPU Cooler Item #: N82E16835999041 |
$12.99 |
| Sony Optiarc 24X DVD Burner, Bulk Package Black SATA Model AD-7280S-0B – OEM Item #: N82E16827118067 |
$16.99 |
| COOLER MASTER R4-C2R-20AC-GP 120mm Case Fan Item #: N82E16835103061 |
$9.99 |
| AMD Athlon II X2 250 Regor 3.0GHz Socket AM3 65W Dual-Core Desktop Processor ADX250OCK23GM – OEM Item #: N82E16819103904 |
$52.99 |
| hec HP485D 485W ATX12V Power Supply – Power Cord Included Item #: N82E16817339020 |
$29.99 |
| G.SKILL Value 4GB 240-Pin DDR3 SDRAM DDR3 1333 (PC310666) Desktop Memory Model F3-10666CL9S-4GBNT Item #: N82E16820231423 |
$20.49 |
| Total | 252.41 |
Making a Closet
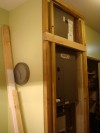
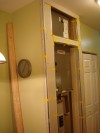
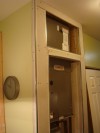
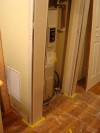
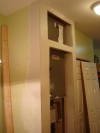
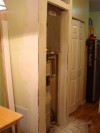
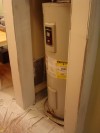
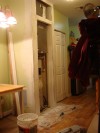
Following Hurricane Irene, my heat pump stopped working. Thankfully, the good folks at my insurance company picked up the tab for a brand new Lenox pump, with an indoor heat exchange. Unfortunately, the new unit was about 4 inches deeper than the old unit, forcing the installers to rip off the front of my utility closet.
So with a few supplies from The Home Depot and some elbow grease, I managed to restore the closet to it’s previous design, plus about 4 inches more. I’m still waiting for two cabinet doors to arrive from eBay, but you can see much of the home improvement work in the gallery below.
Making a Patio
Deeded with the ground floor units of our new homes in Hoboken, NJ, Mike and I each split a back yard. We decided that we wanted to place a 10′ x 10′ square foot patio in the center of the yard so that both units could split it, and still have grass on both sides (for darts or quates or horse shoes or whatever).
I spoke with Andy the Fisch this week about the relaxation and sense of accomplishment that comes with doing yard work. My girlfriend scoffed at yardwork being relaxing, but this is the hottie who thinks running five miles is relaxing…so, I suppose you must always consider your source. Fisch’s response, however, was simply: “Sometimes you want to get your hands dirty.” Well, I couldn’t agree more.

Step One: Weeding
You wouldn’t believe how quickly the weeds sprung up between the inital offer and the move in. To make matters worse, the entire yard is covered with aphids (the ones that itch) and little white bugs. Thankfully, there were no nettles (Ask Tina about her trip to the Lake District in England) or thorn bushes.

Step Two: Marking your territory
Well, the grass came in slowly and sparsely, like my dad’s comb-over, but Mike and I knew that we’d be lugging pavers, grit, sand and dirt through there for the rest of the project, so we didn’t worry too much. We marked a 10’x10′ square in the center of the yard, measuring from the edges to make sure we had equal sides on both, and that it wasn’t skewed with the framing fence and wall. We then put up stakes to try to get a better idea of if it would be big enough (or small enough) and look okay when we were done. Now I hate symmetry, but it’s hard to argue with a 50-50 split on property, so I let it slide for once.

Step Three: Digging the base
When the pavers come, they’ll be 2.75″ tall. We need to put weed control fabric, grit (for leveling) and sand (for locking the pavers in place) underneath, so digging 7″ flat all around should enable us to have a small lip around the patio, but nothing too obtrusive. Mike and I both want the patio to be higher than the surrounding earth so that gravity assists in keeping it clean. We’re keeping the topsoil to fill in the rest of the yard when we’re done, as right now, it ends up being a swimming pool when it rains. And, yes, we’re in a flood zone…

Step Four: Receiving the Materials
The truck came with two skids of materials. The gravel and stone-dust was on one and the paving stones were on the other. If you look real close, you can see Frank Sinatra’s birthplace on the other side of the street.

I need to get me one of these.

Step Five: Laying the paver base
Mike filled the newly-dug foundation with gravel to help keep the stones even when we were done.

The gap in the center is for the fire pit.

Step Six: Leveling with Stone Dust
Then Mike put the stone dust on the flattened gravel, which would enable the pavers to sit level (sort of).

After it was leveled off, we double-checked the width and height to ensure the 6″ x 6″ stones would fit.

Step Seven: Preparing the stones
One stone was about 8 pounds. So moving them 10 at a time was a f’n picnic. 🙂
…especially through a damp, dark basement with low ceilings. I suspect it’ll take two weeks before I can stand up straight again.

Step Eight: Laying the stones
Mike then started from the outside, tiling the stones and checking that they were level (sort of).

When I got back from a morning meeting, Mike was much in need of a break. Because the party was in two days (and we would’ve gotten a ticket if we left the skids on the street), we had to keep working until it was done.

We had originally planned to have the firepit in the center around 2-1/2 feet, but it wouldn’t be centered if we chose an odd number. We decided to make it 2′, minus the width of the framing stones.

Next patio I make is going to be 1 square foot. It was slow, grueling progress…

Step Nine: Finishing up
After all the stones were in, we spread remaining stone dust over the top and swept it in the cracks to lock the pavers in place.

We then took the remaining dirt from the foundation to fill in the yard so it was more level as well. This weekend (after the housewarming party) we’ll lay new grass-seed to fill in the yard so its nice and purty.

Of course we had to have a little party to celebrate the new patio (igore the copious product plugs…Coke and Bud aren’t paying for this placement). Katherine bought some sweet tiki torches for the housewarming which totally added to the overall appeal of the patio.
Interesting side-note: That swoosh of green on the left is a lightening bug caught in the slow shutter of the camera…a true shutterbug. 🙂 Talk about a one-in-a-million shot.


